

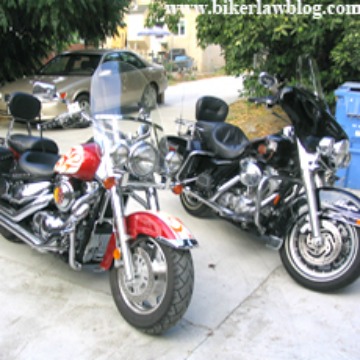
 Between July 13, 2007, and July 14, 2007, I finally got around to installing a Harley Davidson King Tour Pak with all the goodies, on my Electra Glide. The following is a review of the installation, some pictures, and my review.
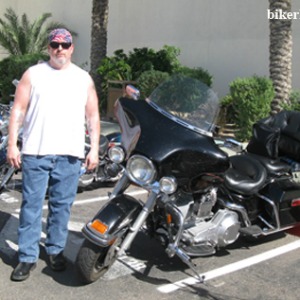
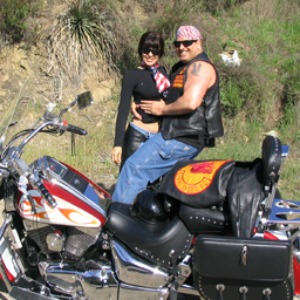
First off, I wanted to add a King Tour Pak to my Electra Glide for added luggage space for long trips which I take quite often, and I wanted the Tour Pak to be detachable so that I can use my standard Harley Davidson detachable backrest and luggage rack for local rides. I also wanted to make the ride more comfortable for my old lady and me, and move her back a bit.
Since I already have the mounting kit for my detachable passenger backrest and luggage rack, I did not have to order the mounting kit for the detachable Tour Pak. I had heard that the plastic bushings do wear out on the docking points after a while so I will probable order some spares in the future as needed.
The Harley Davidson King Tour Pak is a custom order product from Harley Davidson because it is manufactured and painted at the factory depending upon your motorcycle and color. My Electra Glide is Vivid Black so that is what I ordered. When you order the King Tour Pak you are told that it can take between 6 to 8 weeks for delivery because it is a custom part. I got lucky and got mine within 3 weeks because Harley Davidson already had a vivid black Tour Pak in stock at the factory.
 When you order the Harley Davidson King Tour Pak, you also need to order other parts with it so that it can be locked, installed, etc. All that comes with the Tour Pak is the actual Tour Pak in the box, some holes pre-drilled in the bottom, a hole for a key set, a rubber mat for the bottom, and a leather pouch. That is about it. Secondly, when I opened the box there were no reflectors, or anything on the outside, except the Harley Davidson inscription painted on the top. Of course it was vivid black!
Along with the Tour Pak I had to order, a lock, and a bunch of separate parts for the lock assembly so that the Tour Pak can be locked. This was not mandatory, but in my opinion it would be stupid to put on a Tour Pak without a lock, and that leaves a big hole on the side!
Luckily the place I ordered my parts from; Chicago Harley Davidson online, found that I was missing a 25 cent washer from my order and added it for me! Along with the drum lock comes two additional keys for the lock which are cut for your specific motorcycle. I needed my VIN number so that Harley Davidson could cut the keys for my motorcycle. Now I have 3 spare keys for my motorcycle. That is a good thing I guess!
Here is a list of the parts I ordered for this installation:
King Tour Pak Vivid Black – Harley Davidson Part No. 53116-97DH
Suggested Retail- 675.00
King Tour Pak Pillow like passenger backrest – Harley Davidson Part No. 53116-97DH 52201-97A
Suggested Retail- 209.95
Removable Rack for Tour Pak – Harley Davidson Part No. 53116-97DH 53276-04
Suggested Retail- 169.95
Lock for Removable Rack – Harley Davidson Part No. 53116-97DH 46063-98
Suggested Retail- 32.95
Set of Two Locks for Removable items – Harley Davidson Part No. 53116-97DH 46106-00
Suggested Retail- 59.95
Antenna Relocation Kit – Harley Davidson Part No. 53116-97DH 76326-00A
Suggested Retail- 99.95
Lock for Tour Pak (this can be keyed for your bike, you need VIN or Key Code – Harley Davidson Part No. 53116-97DH 53848-00
Suggested Retail- 20.00
Nut for Tour Pak Lock – Harley Davidson Part No. 53116-97DH 84850-92
Suggested Retail- 1.50
Custom License Lay Down License Plate Bracket
$25.00
Crutchfield Amplified Antenna for Inside Fairing
$20.00
 Installation of the Tour Pak
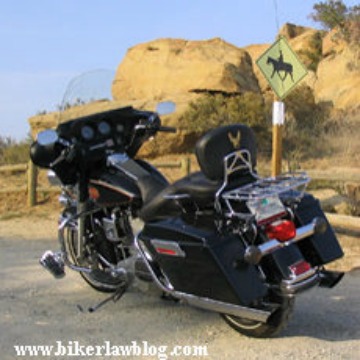
As you can see from the pictures, the installation of the Tour Pak was not bad for a non mechanic like me, but it did require some drilling on a brand new and freshly painted fiberglass Tour Pak which cost me a chunk of money. I was not happy about having to drill holes to mount the premium luggage rack, the passenger backrest, and removable Tour Pak rack, but it was a hell of a lot cheaper than letting the dealer do it!
The first thing I installed was the lock assembly for the Tour Pak. Since it came with no instructions, I relied on my trusty shop manual to do the installation. By the way, a shop manual for a Harley Davidson is a must! Once I got the lock assembly on and made sure it worked ok, I proceeded to install the premium luggage rack.
The premium luggage rack came with a template that you tape onto the top of the luggage rack to find your drill points. First I cut out the template for my Tour Pak type and rack and placed it on the top of the Tour Pak. Even with the template on, you have to eyeball the placement to ensure that it is straight, and there is enough room for the passenger back rest pad and a future spoiler if you are going to install one on the Tour Pak. I eyeballed it to ensure it was where I wanted it. I then placed painter’s grade masking tape in the area where the post were on the premium luggage rack, and then traced a circle around each post to find the center. I then made an X in the circle to find the center. Once this was done, used a punch tap to make a small indentation for the drill bit, I did not use a hammer for obvious reasons; instead I worked the tap in so that it would make the indentation for the drill bit. I then placed a very small diameter wood drill bit into my drill and set the drill to a slow setting so that the drill would not go too fast and heat up the fiberglass or crack it. Then I started drilling. No big deal. Once I got the small bit through, I worked my way up through two larger drill bits before I got to the right size. I did not start with the proper diameter bit first for fear of cracking the area where I was drilling or causing paint damage. It is real important to drill on the masking tape and not the paint itself for obvious reasons. If you drill is set to a high revolution setting or you do not have a proper tap it can walk across the new paint and cause paint damage or worse. The painter’s grade masking tape is important as well, because it comes off easy and does not damage the new paint.
 Once I got all 4 holes drilled for the luggage rack to the proper diameter, I cleaned the holes of any debris that was left. I then checked the rack for proper fit and wholla, it fit perfectly! I used a waterproof silicon glue on the screws that screw into the rack from the inside of the Tour Pak lid, and go through the lid into the premium luggage rack mounting post, so that it would be waterproof; the job was done, the rack was on straight, and now it was time to add the removable Tour Pak mounting bracket!
The Removable Tour Pak mounting bracket allows you to remove your Tour Pak from the motorcycle so that you can set the motorcycle up for solo operation, or use the Harley Davidson removable passenger backrest and/or luggage rack. I opted to go with this option so that I could take the Tour Pak off whenever I wanted.
The first thing I did with the rack was to install the removable accessory lock on the mounting bracket. With a combined part the cost around $1,500.00, there is no way that I would not use a lock on this setup. The lock prevents someone from just coming along and stealing your Tour Pak setup with the easy detach kit on the removable rack. The installation of the lock was no big deal and simply involved removing the regular circular mounting accessory from the rack, and installing the locked version. I installed mine on the right hand side.
 Next I proceeded to put the Tour Pak on its side to align the holes for mounting the Tour Pak to the detachable Tour pak rack. I would recommend two people for this part of the install but I managed to get it done by myself.
Low and behold the pre-drilled holes on the bottom of the Tour Pak did not line up with the detachable Tour Pak Rack. They are apparently drilled out for the permanent Tour Pak rack. This was a real bummer; more drilling. As discussed above I put painter’s masking tape where I needed to drill. Used a tap to make a notch for the small drill bit, and then proceed to drill with a very small drill bit at minimal revolutions, working my way up to the proper size. Once the holes were drilled I mounted the Tour Pak to the detachable rack. It went on perfectly.
The next order of business was to install the passenger pillion cushion onto the Tour Pak; again more drilling. The passenger pillion came with a paper template, to tape on to figure out where to drill the front of the Tour Pak out for the male studs that are a part of the passenger pillion setup and go through to the inside of the Tour Pak. I took a little more time doing this step because of the curves in the Tour Pak where the passenger pillion attaches. I repeated the same drilling process mentioned above after I was sure everything was lined up. Let me tell anybody contemplating doing an install like this; take your time. One screw up and you will have either multiple holes or a crooked setup. Luckily for me, the passenger pillion lined up perfectly with the holes that I drilled, and it bolted on perfectly.
 I do have a pet peeve with Harley Davidson; why would they sell a model specific Tour Pak without holes for the passenger pillion and mounting bracket pre-drilled? I can understand not putting holes in for a luggage rack because some people may not want it, but the other holes; come on! Anyway………………
After getting everything ready to mount on the motorcycle, I vacuumed the bits of fiberglass and dust that accumulated inside the Tour Pak during the drilling process. I took a few pictures of the completed product before mounting. Unfortunately I did not take pictures of the entire installation process; I just wanted to get the job finished if you know what I mean.
Now for the fun part; I carried the King Tour Pak out to my Electra Glide to attach it to the motorcycle, and low and behold, it would not seat all the way down on the mounting docks for the detachable Tour Pak because the stock license plate was in the way.
All of the Harley Davidson documentation states that the Stock License plate bracket should work with the detachable Tour Pak rack but it did not!
I called multiple Harley Davidson dealers. Most of them told me that it was supposed to work and that I should bring the motorcycle in for them to look at! How can I ride the motorcycle to the dealership with a Tour Pak that is not fully on! At the time I was doing the installation, I did not have someone who could carry the Tour Pak in their car while I rode the motorcycle, and besides, I was really pissed off at this point. One dealer about 100 miles away indicated to me that he had an aftermarket lay down license plate bracket that may work, but after reading the documentation on the license plate bracket he wanted to sell me, it turns out that it specifically will not work with a detachable Tour Pak. Harley Davidson’s lay down license plate bracket also will not work with the detachable Tour Pak. I was at a loss. Harley had a solution that would have required using a license plate bracket down near the brake lamp that required drilling out the fender. There was no way I was going to be drilling on my pristine fender just for a license plate bracket. Hell I am a motorcycle lawyer, not a fabricator or mechanic.
 I figured that I could take the stock license plate bracket to a machine shop and have them shave the top around ¼ inches and that would do the trick.
Luckily, I found a guy on eBay selling a custom license plate bracket made exactly for my application. So rather than trucking the motorcycle to the dealer, drilling out the fender, or finding a machine shop, I bought the custom lay down license plate bracket from the guy on eBay. Unfortunately, I had to wait for the part to come. However, once it came it fit perfectly!! I am glad I went with this solution rather then gerry rigging something else. The guy on eBay was fully aware of the “non-fitting” stock license plate bracket with the detachable Tour Pak kit, and he custom makes a solution that is very well made. I am sure you can find him on eBay if you need him, if not contact me and I will put you in contact with him.
What to do with the Stock Whip Antenna?
First off, I ordered the Harley Davidson Antenna relocation kit with the intent of using it on my Tour Pak setup, and then reusing the same antenna when the Tour Pak is not installed. This is exactly what the relocation kit is supposed to do. You simple screw the Antenna onto the Tour Pak when it is being used, and then screw a connecting cable between the Tour Pak and the motorcycle. When the Tour Pak is not in use, you simply screw the whip antenna onto the bracket mounted on the motorcycle. Sounds easy enough! Right!
 Before I actually went to mount the Tour Pak on the Electra Glide and discovered that the license plate would not let it seat down all the way on the docking points, I prepared the Antenna Relocation Kit for installation as well. On my motorcycle the whip antenna was on the right side of the motorcycle, but the antenna relocation kit is designed to be mounted on left side of the motorcycle. Damm; I would have to re-route the antenna cable.
First, I proceeded to remove the seat, and the stock whip antenna bracket and assembly on the right side of the motorcycle. I then traced the antenna cable from where it was routed along the frame, and cut the tie wraps holding to the brake and turn signal cable, to free it up to route along the left side of the motorcycle. I then re-tie wrapped the brake and turn signal cables in their original position. I then re-routed the antenna cable across the left side of the motorcycle near the battery, and to the back of the motorcycle. Luckily there was enough antenna cable to reach the left side where it needed to be.
I then mounted the Antenna Relocation kit on the left side of the motorcycle on the back of the bike, and screwed the antenna cable onto the bottom of the connection where indicated in the directions. I then tie wrapped the antenna cable so it would be secure on the left side of the motorcycle. It was ready to roll!
 Then the bummer…….. I tried to remove the whip antenna from the stock stud using pliers, wrenches, you name it. It kept turning and turning but would not come off of the stock stud. After thoroughly ruining the bottom of the stock whip antenna I realized that there was a very small allen screw that held it on. Stupid me. After removing the allen screw, the antenna would still not come off. I had stripped it. Oh well, I called Harley Davidson and it would be no big deal to get a replacement whip antenna. I then looked at the instructions for mounting the Antenna Relocation Kit onto the actual Tour Pak, and to be frank I was disgusted. The instructions called for all sorts or measurements to be made so that the mount would be perfectly placed on the Tour Pak, but what really bothered me was the fact that the instructions called for drilling out a ¾ inch hole on the back of the Tour Pak, and on the front bottom of the Tour Pak for the cable. To top it off, the kit did not come with a rubber grommet to waterproof the hole for the cable the goes out of the bottom to the connection on the motorcycle. I called Harley Davidson and they were no help with respect to getting a rubber grommet to ensure that the hole was water proofed. To top it off, I realized that the protruding portion of the Antenna mount inside of the Tour Pak would take up valuable room, as well as the cable to the back bottom of the Tour Pak. Furthermore, an antenna mounting on the back of the Tour Pak where it is supposed to be mounted would interfere with each access to the inside of the Tour Pak from the back. It would be in the way!
 It was at this point that I remembered some guys using hidden fairing antennas that do away with the whip antenna in the back, and give you a cleaner look on the back. I did some research on the internet and discovered that there were indeed different types of antennas that could be used to replace the whip antenna that would mount and be hidden inside of the fairing. Some hidden antenna set ups cost as much as 80 bucks! I decided to try out a 20 dollar amplified antenna from Crutchfield. There were also some solutions available on eBay. I used Crutchfield because I knew they would ship quickly and that there would be no hassles.
I then proceeded to remove the Harley Davidson Antenna Relocation Kit from the motorcycle. I coiled up the Antenna cable and stuffed it in the battery compartment area just in case I decide to use it in the future.
Once the Crutchfield amplified antenna came, I removed the front fairing from the Electra Glide, taped the flat antenna on top of the Harley Davidson Advanced Sound System, spliced into the cigarette lighter for my 12 volts, grounded the antenna, and wholla it worked! Obviously I tested it before I put the front fairing back on.
 Now I will be frank, the hidden antenna is flat out not as good as the stock whip antenna. FM and Weather band work perfectly, but my AM traffic and talk show channels do not come in like with the whip antenna. Most of the time I ride, I have my MP3 player plugged into the auxiliary jack of the Harley Davidson Advanced Sound System anyway so it is no big deal. FM works, and some AM works. I may later decide to go back with the whip antenna setup, or I may sell the motorcycle and do another setup, you never know. At least for now, I have a hidden inner fairing antenna that works well enough, and a spare Harley Davidson Antenna Relocation Kit never used complete with instructions that I may stick on eBay since it is taking up room. If you are interested in buying it, shoot me an email to norman@norman-law.com .
Review of the Tour Pak Set Up Finally!
I do not know how I ever lived without a Tour Pak before. That is my frank and to the point assessment of the Tour Pak. I have in the past ridden Japanese Cruisers, Harley Davidson Hardtails, Harley Davidson Softails, and everything in between. My Electra Glide has very spacious hard saddlebags, however nothing comes close to having a Tour Pak that you can open up and put all of your stuff in without any hassles! The Tour Pak fits two full size helmets and a whole bunch more. I do not use my saddlebags anymore in most cases! I am presently selling my Kuryakyn Full Dresser Motorcycle Luggage, (If you are interested in buying it shoot me an email) and am looking for a big Tour Pak bag to mount on top of the Premium Luggage Rack for long trips. I will tell you what; I am no longer worried about having room for storage on long trips! I have not taken the Tour Pak off since I installed it even though I have the removable kit! There is just no need at this point. The motorcycle rides just as well with the Tour Pak on as it does off.
 Relocation of the Passenger Backwards on the Electra Glide!
One of the other reasons I got a Tour Pak was to move my passenger back a couple of inches to give me more room. With the stock passenger backrest, we felt cramped. I like to spread out on the bike and have lots of room.
There are a couple of kits on the market to relocate the Tour Pak back anywhere from 2.5 inches to 4.75 inches to give you and your passenger more room to stretch out. I purchased a 4.75 inch Tour Pak relocation kit that will move the Tour Pak back 4.75 inches. I have not installed the kit yet so I cannot review it.
All in all, this was the best approximately $1,500.00 upgrade I have done on my Harley Davidson Electra Glide. I guess you would call me a Bagger now! I do not mind. I am 44 years old; I have ridden all over the country with no windshield, and minimal storage. I have eaten bugs, been hit by rocks, dirt, and debris, holding on at 80mph as the wind pushed against me. I kind of like luxury now. For me and the kind of riding I do, I can never see going back to riding a bar hopper!
The Harley Davison Tour Pak is a must for anyone with a FLH model.
If you have any comments I would like to hear them!
By Norman Gregory Fernandez, Esq., © 2007


Your step by step installation of the Tour Pack has about convinced me to make the move for the upgrade. I recently purchased an ’08 Black Pearl Road King. I too added the removable backrest and was thinking about Tour Pack for my scoot. $1500.00 is a serious investment, but the space would be welcomed when the wife is with me on a long haul.
Thanks for in depth article on your “hands on” install.
Thanks for the review, and installation guidance. I too am considering doing exactly what you did. I’ve got a 2000 Road King with 60,000 and aways had the soft luggage hooked on behind. What a pain. My buddy rented a classic and he had the trunk. Every stop he was in and out, so easy, so clean. I made up my mind to find a set up so I could have one. You convinced me. I’ve been watching ebay for a couple of months, but those things used are outrageous. So I considered going new. I found a web site on line that offers new HD Parts with 20% off. That’s pretty significant on $1500, so that’s the direction I’m headed. Thanks again, great article, and very informative. I’m not a mechanic either, so maybe that’s why I enjoyed it so much.
Great article I have been debating either going with a tour pack set back kit or a detachable one, never gave the antenae issue much thought Think I will stay with the hard mount Thanks again
I just finished reading your article on the tour pak installation. I had a tour pak installed on my FLHX (Street Glide). I’ve had my bike since 2006 and currently at 26,000 miles. During this time I’ve taken my bike back to the HD shop to have 1 or 2 docking points replaced for cracking. I’m curious if you’ve had problems with cracking docking points that will cause your Tour Pak to slightly rock back and forth. If so, do you know of any aftermarket part that are not made of this hard plastic material? I don’t overload my tour pak and I’m very gentle when removing and placing my tour pak back onto the docking points. I just returned from a trip to Key West and will need to replace another docking point. My HD service department told me that they would not replace another point for me for free.
Any questions or comments would be appreciated.
Thanks
I found some here: http://www.cvoharley.com/smf/index.php?topic=17137.0 (you have to register to read the post). However, the guys email addy is gilbos440rt@bellsouth.net that makes them. I have been searching for them and finally found them. I am contacting him to purchase a front set. Thought maybe someone here may be interested.
Now, looking back, would you have rather just purchased the electra glide classic and saved the hassle of having to install the tour pack, and radio? Radio install is not difficult I know, but honestly, $2000 msrp more and you get the pack, radio, and a few chrome adds. I almost bought a standard, and am glad I went and got the classic instead. Now I kind of regret not getting the ultra just for the lower fairings and rear speaker pods that Ill be buying as aftermarket in the future.
looking for a used, but very nice tour pack to put on my 2006 Harley. My present one has a crack in it from an incident. Prefer lights and rack, but not necessary. Willing to pay reasonable price. Will paint it to my satisfaction. If any be known,please contact me ASAP.
Jim–POWERPIKES
I bought a EG standard and was told by the dealer I had to order the King Tour Pack and accessories immediately in order to get the discount .When I went to work the next day a coworker sold me his off of his classic,Needless to say the dealer would no refund my money and now I am stuck with two of them.i am willing to part with it but it’s the King Tour Pack only.Leave number a I will contact you ASAP .
I have just purchase a new tour pak from a dealer in Mason city Iowa and they give a great price. I bought the King tour pak for about 630, new in the box. I read in your article that you have the install instrutions for the lock. Would you be willing to share? I could just go to the dealer and look how it installs but it would be greeat to have the instructions
Has anyone wired a tour pack up to a road king? I have only the two running lights at the bottom of the bag. It isn’t back from the painter yet, but will be digging into this soon.
i removed my taillight/brake light and ran a red and black , use a current indicator to find the constant for red, spice and tape (electical) yeah its low end jimmy rigging , but hey it worked for me and now when my bikes on, all running lights are on including tour-pak…….hope this helped
I did like your review and it convinced me to do the same. 2009 Standard, purchased all parts required to do this task. Total install time: 1 hr. Now I did not put the rack on yet. I want to install the new air spoiler with brake lights. I like the idea of having more lights, but not when I have to cut into the pack. I also like the thought of no radio components on the bag. Your right, sealing this is a big deal. the other part was the tour pack came drilled for the luxury back rest.. Got lucky here. Ordering what you want from the get go is benificial. Lock was drilled as well. This should answer for why it was so easy. The other part was making sure I had all the essential parts. With research I noted a major difference between dealerships and those that have done this before. If any one is interested, I can post the exact part numbers less the tour pack number. There are a few parts that are usually over looked, like the rear rail covers. One dealer said notch them with a grinder, you don’t need them, leave them off… Yuk! it will look exactly what passed your thoughts. Went the better route, got the right parts. Having said all this, the tear down and install was competed in an 1 hour and half. The radio is next.. Any suggestions? Thanks
Ride Safe, Have Fun
Tom
Ret, USAF
hi iam looking to put a tour pak on my streetglide 2006 it peral black. i dont know if you guys sell them i just need the shell hinges and lock. if you sell them please email me with a price. thank you mark
Nice article. I purchased a King Tour-pak off of ebay last year. I paid 160 for the older pak and had cracks repaired and painted for 200. I mounted it to my existing detachable assembly for my Road King Classic leather pak (too small). The stock license plate fit just fine. I also purchased 1970 Batwing HD fairing from ebay and adapted it to my Road King. I like the older fairing because it is just a shell and adds no weight to the steering head thus better handling. I also found an early Harley fairing eagle decal in mint condition to put on the finished white fairing.
I have had really good luck with ebay parts. Don’t buy windshields however, unless you are adept at polishing…the scratches do not show up in the photos.
I also bought hard bags, had them painted to match, from ebay as well as bag rails. I have approximately 1500 into my fairing, trunk , hard bags and rails. I had the accessories all painted in off white. My Road King is brandy wine sunglow and I wanted the bike to have the early 1970s two-tone shovelhead bagger look.
Again thanks for the article!
I found the George Anderson Tour-Pak Relocator Kit on a website, http://www.tourpaks.com It works on 1999 FLH to the 2009 FLH and the 2006 – 2009 Screaming Eagle.
This place takes PayPal and credit cards wich worked better for me.
Norman
I have a 2002 Electric Glide. Do you know if the part numbers to order would be the same as you have listed??
Thank You for the step by step instructions!!
Regards,
Mark
It was mentioned in the artical about a lock for the detacable rack, I wonder how the installation went for that and how well it works in daily use.
From one lawyer/biker to another, thanks for the informative article. I just upgraded from a Super Glide Custom to a 2009 Road King Classic, and am trying to do all the research before I take the plunge on the Tour Pak. You mentioned that you had purchased a relocation kit that will move the rack back 4.75 inches. First, did you ever install it and if so, how do you like it. And second, what brand is it and where did you get it?
Thanks!
I just installed a Tour Pak on my 2010 Ultra Classic Harley and i was wondering if they made a part that covers that hideous looking bracket when the Tour Pak is removed?
I am looking for a chrome cover.
Can you help me please?
i have a 05 road king, i recently added a chopped tour pack, then had a custom speakers installed in both saddle bags and what not. I wanted more sound so i was thinking i would add rear speaker pods but from what i gather the ones Harley sell dont fit the chopped pack. wondering if they can be modified or made to work…
Thanks for your comments Gilbert. Let me tell you, I cannot imagine how I used to get along without the Tour Pak. This thing fits everything in it including two full face helmets!
I rarely take it off!
Norm
With respect to the plastic docking points, I found a guy on a Harley Davidson forum that manufacturers high grade aluminum docking points that do not crack and fit mate much better to the removable tour pak than the stock points, i.e. no vibration or looseness.
I will try to get the guys info and post it on here.
Norm
Yes I think it is the same guy. Good luck!
Norm
Jim I bought mine new from Harley Davidson. You may want to look on Ebay and save your search so you can keep checking back. I hear that a lot of guys get good deals on used Tour Paks on Ebay.
I have also heard of guys repairing cracked tour paks by using fiberglass and resin. You can buy the stuff online at auto body repair sites.
You may find an auto-body repair guy or shop that can fix the crack for much less than buying a used tour pak.
There are options.
Take care,
Norm
Mike I used my Harley Davidson Shop Manual to figure the lock setup out. It is not just something that you can figure out, trust me. You can and should buy a shop manual for your motorcycle. It is just a good thing to have. I would like to post a copy of the instructions and/or diagrams for the lock, but that would be a copyright violation on my part since the book is copyrighted.
Congratulations on getting a great deal on your tour pak,
Norm
Hey Tom I was in the Air Force once upon a time!
You got lucky not having to drill the holes for the passenger backrest. Looking back on it now, it was kind of a bitch.
With respect to a radio, I bought the Harley Davidson Advanced Sound System for mine, as the first upgrade I did to the bike.
If I had to do the stereo all over, there is no doubt that I would go with a Biketronics solution. Their URL is http://www.biketronics.com/touring.html#RRPackages
You get to use all of the stock Harley Davidson controls, yet you get an Advanced Sound System that has many more features than the Harley Davidson system for a lot less money.
Let us know what you do!
Norm
Mark I am a biker lawyer, not a parts dealer. You may want to contact Harley Davidson or some other vendor.
Norm
Sounds like you did good with your eBay purchases. I have also heard eBay can be good for these types of purchases. I looked as well. I did not find what I wanted at the time, and did not really want to go through the hassle of repairing parts. However, I am sure that people who want to go this route can save tons of money.
Norm
It has been a while, but I believe they are. Your best bet is to call a Harley dealership and confirm the parts list before you order.
Norm
I think the lock is mandatory if you are going to use a detachable tour pak. If you don’t have the lock setup someone can just come and steal your thousand dollar plus setup.
The lock does its job. It is real tight getting the special key in to unlock it but it does unlock. I suppose Harley Davidson could have designed it better, but the way it is does make it harder for crooks to get to as well.
Norm
Good to see you on here Jeremy. Yes, I am using the 4.25 inch tour pak relocation kit from Harley comforts. You can read an entire article on the options for tour pak relocation kits here:
https://bikerlawblog.com/index.php/wind/2008/06/06/two_great_after_market_products_for_the_
Make sure you cut and past the entire URL into your browser. You an also search for Tour Pak on the main screen to find it.
Norm
If you are removing a removable tour pak there is no bracket, just docking points. If you are removing the Tour Pak from the permanent mount you are S.O.L. The only option of to go with a removable setup.
Norm
Yolanda you failed to state if you have a fairing on your Road King, or if the saddlebag speakers were your primary speakers. I am not sure if they make speakers for the chopped tour pak. You may want to talk to Biketronics at http://www.biketronics.com to see if they have something that could be adapted.
If you do have a fairing with speakers, you may want to try an amplifier.
Norm
I have been fighting the tour pack on my 2003 FLHT since installing it in 2003.
The vibration from the bike continually vibrates the latches off; the vibration has cracked the lid at the front hinge; and now one at a time the upper latches have vibrated off breaking the plastic off.
The tour pack latch system is pot metal, and the plastic box and lid cannot withstand the vibration my bike puts out. Other tour packs are even a lesser quality. I am going to build one from Texallium so I can color key it. Quality is NOT part of Harley’s tour packs from the 2003 era.
Great review,
I am currently working on a similar addition to my 2010 FLHX. So far I have purchased a King Pak, Backrest, Mounting bracket, and mounting platform from ebay spent under $400 bucks. The King pak I bought is an older fiberglass model still in great shape but had to have it painted at a local shop, that cost me $300 but it is a perfect match. I noted in your pictures you posted, that aside from the detachable platfrom there appears to be another part between the platform and the pak (it seems to be like a round tube) but I could not enlarge the pic to take a closer look can you advise what that is?
Nontheless, My project is about complete coming in under $900 bucks and its a great addition.
It is part that goes under the pak that bolts to the actual pak. It also bolts to the detachable tour pak.
Norm